Friday 22 February 2013

Inspired by Dyan Reaveley

Also at the CHS show, I watched Dyan Reaveley demonstrate her new Dyelusions colours, stencils and stamps, all of which I loved.

Something really useful I picked up was that she mops up the inks with the whole kitchen roll - just dabs all the excess ink away on the roll.  I had been struggling with this before as the inks pool a lot when you spray them on and I've always left them to dry for ages.  This way, you can just get straight on with the next stage - stencilling or stamping or more spraying - Dyan was using her white semi-opaque spray to create a shadowing effect.

All of this was fantastic, so when I came home, I had a go.  This is what I did:


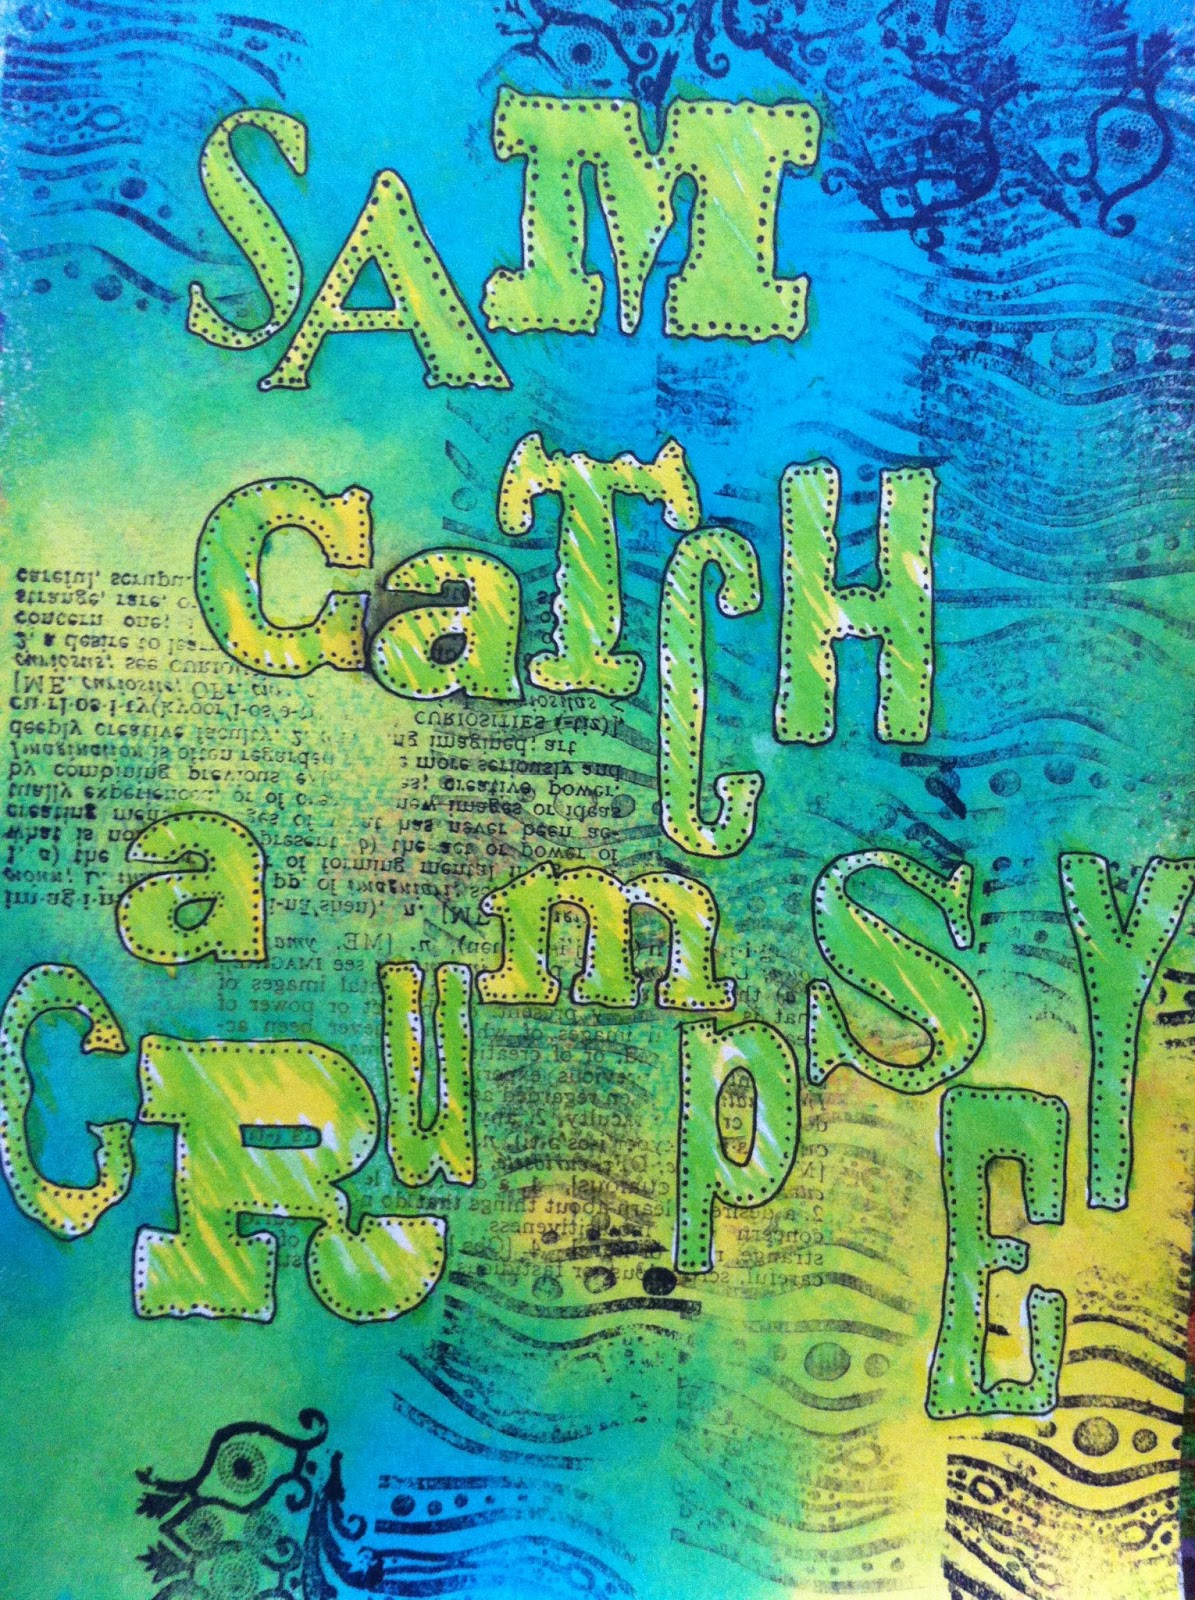
I have to say that she makes it look effortless, whereas I had a few crises of confidence whilst doing it.  I used the Tim Holtz Random Alphabet mask to block out the lettering, and then sprayed Dyelusions sprays over the top.  After mopping up the excess, I stamped with Stampers Anonymous Tattered Elements and a Moulding Mat Lava Lamp.  Then I removed the masks and coloured in the lettering with a brush and Dyelusions (as I had seen Dyan do).  Then I did some extra detail with a Sharpie.

I have been doing some more and will post those when I have finished them.

Craft, Hobby and Stitch Show

I spent a few days earlier in the week at the Craft, Hobby and Stitch Trade Show at the NEC and had a great time.  It was my first visit, so a lot of the first day was spent wandering around looking at all the exciting things going on.

I did a few workshops to test drive some new products.  First up was Pan Pastels.  We used thick sponges to apply the pastels onto card and blend with other colours.  Here, orange, pink, purple and black around the edges were used.  The card has such a silky feel after, though I think there were a few dirty fingerprints on it where I took the pastels with me...

Next we tried stamping with clear ink (Versamark Watermark pad) and then a thick brush was used to get powder from the pastel pad and brush over the stamped images.  The powder adhered to the ink, and then you were free to blend different colours  on top of that.  The stamped image held its colour very well.


Next up was using stencils.  I loved this leaf stencil, and layered it up with different colours of Pastel.


We used some Maimeri gel medium which we added colour from the pastel by brushing from the palette onto the medium.  It mixes into a much lighter colour but the application with a palette knife was smooth. I gave it a bit of texture spreading it around.  It dried quite quickly so I wouldn't make masses of it up - just a bit at a time.


Finally, we used a water brush pen with the pastels.  We rubbed some of the pastel off into a tiny bit of water, and then brushed on like a watercolour.  This just was a quick colouring in of a stamped image:


So all in all, a very interesting workshop. The Pastels seem very versatile, and people are getting excited about them on the web.  There are 80 colours to choose from, so a huge range to choose from.

Tuesday 12 February 2013

Published in Stitch Magazine

Some great news - I have an article published in this months Stitch Magazine!  I have written an article on die-cutting and what you can create specifically with fabric.

cover of Stitch current issue
Issue 81 Feb/March 2013

http://www.embroiderersguild.com/stitch/currentissue.html

It is a great issue this month, and has articles by the fabulous Maggie Grey, Kathleen Laurel Sage's interpretation of Angie Lewin prints, and some wonderful books by Frances Pickering.

My article looks at die-cutting (all done with my trusty Sizzix) and I have made a wall hanging and book cover


Monday 4 February 2013

Crocheted jumper

I can't remember if I made mention (must have been a while ago), of some Rowan Creative Linen I bought in Darkness (the colour).  Well, since October, I have been beavering away at my very first jumper.  And now I have finished.  For those of you who have read my other posts, my previous forays into crocheting have been of the novice (ie onion cosy, granny square-ish).  So I'm not really sure what I was thinking when I decided to tackle the Estella Jumper by Marie Wallin for Rowan.  It was featured in the Rowan Holiday Crochet book, and I found the pattern in Inside Crochet magazine (issue 33, September 2012).

This is what the jumper proper looks like:

Estella
http://www.knitrowan.com/designs-and-patterns/patterns/estella

And this is what mine looks like:


OK for a first attempt I think.

The stitches used were slip stitch, double crochet and broomstick stitch.  I had never done the latter before, which I was a bit nervous about, but the internet is a wonderful thing, and I found several You Tube demonstrations.  I will try and do a picture tutorial tomorrow, as it was very easy to grasp and a lovely stitch.